This post contains affiliate links.
Updated on January 1, 2024
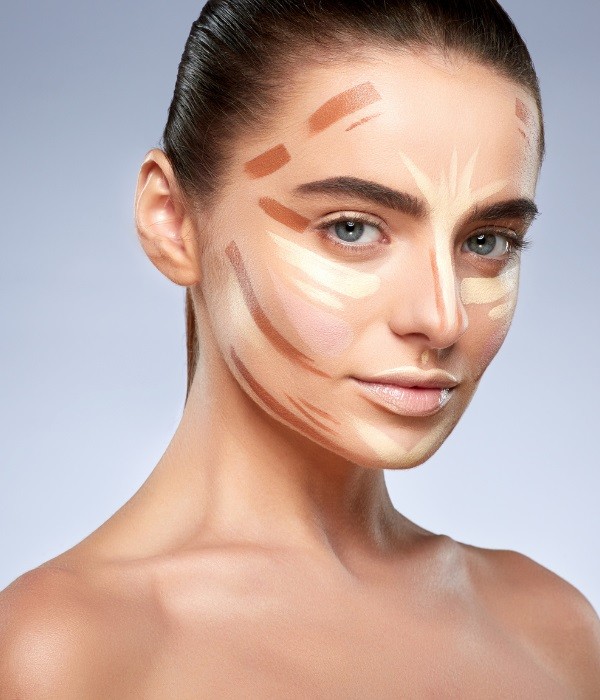
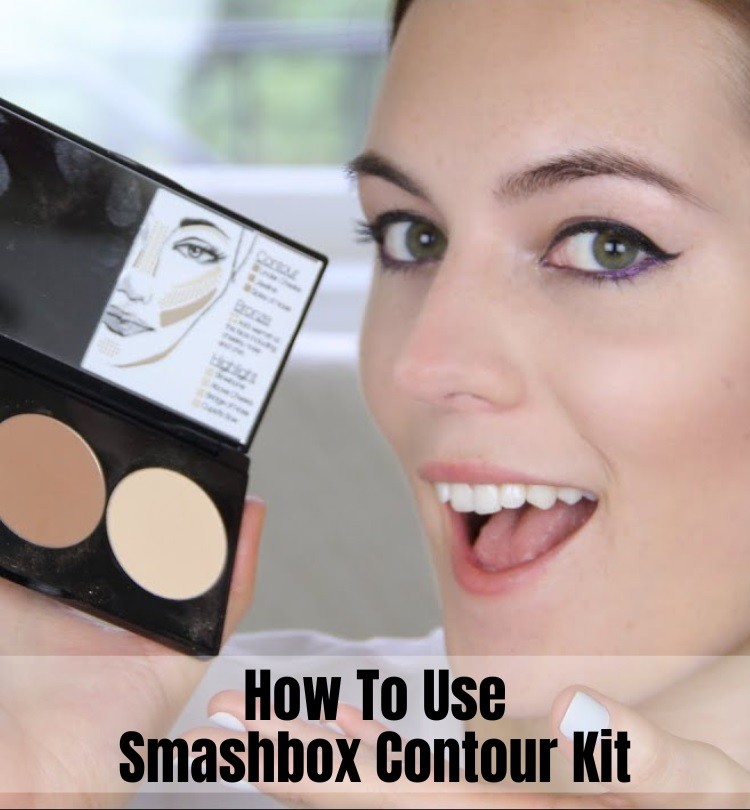
To use the Smashbox contour kit, apply the contour shade to the hollows of your cheeks, temples, and along your jawline, then use the highlight shade on the high points of your face such as the cheekbones, center of the forehead, and bridge of the nose. The Smashbox contour kit is a great option for those looking to add definition and dimension to their face.
This kit comes with two shades, a contour and a highlight, that work together to create a sculpted and highlighted effect. We will dive deeper into how to use the Smashbox contour kit to achieve a flawless contoured look. With these simple steps, you’ll be able to enhance your natural features and feel confident in your makeup skills. So, without further ado, let’s begin!
Contents
The Basics Of Contouring With Smashbox Products

Related: How To Use Anastasia Contour Kit?
What Is It And Why Smashbox Is A Popular Brand?
Contouring is a makeup technique to enhance facial features by accentuating and defining the bone structure. Although it may sound intimidating, it’s simple to learn with the right tools. Smashbox is a popular brand that has carved a niche in the cosmetic industry with its extensive range of contouring products.
They offer a diverse range of contour kits in various shades and finishes to suit different skin tones and preferences. Smashbox’s contouring products are highly sought after for their:
- Quality pigmentation
- Long-lasting formula
- Versatility in creating different looks
Key Benefits And Features Of Their Contour Kits
Smashbox’s contour kits are formulated to sculpt, define and highlight the face, making it look chiseled and well-defined. Here are some key benefits of using Smashbox’s contour kits:
- Provides a natural-looking finish
- Suitable for all skin types
- Creates a variety of looks, from subtle daytime to glam evening looks
- Offers a perfect balance of matte and shimmer shades
Here are some features of Smashbox’s contour kits that make them stand out:
- Infused with light-diffusing technology for a soft-focus effect
- Includes step-by-step instructions to guide beginners
- Comes in a sleek and travel-friendly packaging
Differentiating Between Smashbox Contour Kits
Smashbox offers a range of contour kits to suit different skin types and preferences. Here’s a brief overview of each kit to help you choose the right one for your needs:
- Step-by-step contour kit: Ideal for beginners, includes 3 shades to contour, bronze, and highlight the face.
- Cali contour kit: Perfect for achieving a sun-kissed look, includes 6 shades to sculpt and add warmth to the face.
- Contour palette: Offers a wide range of shades to complement different skin tones, and comes with a highlighter and blush to complete the look.
- Studio to-go contour stick trio: Convenient for on-the-move touch-ups, includes 3 sticks with a cream-to-powder formula for a seamless finish.
What Comes With A Smashbox Contour Kit?
Smashbox contour kits typically include 3 to 6 shades to sculpt, bronze and highlight the face. Here’s a comprehensive guide on how to use them:
- Prime the face before applying the contour kit.
- Use a dense brush to apply the contour shade along the cheekbones, jawline, and temples.
- Blend the contour shade with a fluffy brush to blur any harsh lines.
- Use a smaller brush to apply the bronzer along the hairline and under the cheekbones.
- Apply the highlighter shade to the high points of the face, such as the cheekbones, bridge of the nose, and cupid’s bow.
Usage tips:
- Use the shades in moderation to avoid looking overdone.
- Layer the shades for added intensity.
- Blend, blend, and blend again for a seamless finish.
Smashbox contour kits are an excellent choice for anyone looking to enhance their facial features. They offer a range of products that cater to different skin tones, preferences, and expertise levels. With the right techniques and tips, anyone can learn to contour like a pro.
Step-By-Step Guide To Using Your Smashbox Contour Kit

Choosing The Perfect Shade And Texture
When it comes to choosing the right shade and texture of the Smashbox contour kit for your skin type, there are a few things you should consider. Here are some tips to help you find the perfect match:
- Choose a contour shade that is 1-2 shades darker than your skin tone. If you have fair skin, go for a light shade. If you have medium skin, choose a medium shade, and if you have dark skin, go for a dark shade.
- You should also consider your skin’s undertones. If you have warm undertones, choose a contour shade with a warm (yellow or orange) undertone, while those with cool undertones should choose a contour shade with a cool (pink or grey) undertone.
- Make sure to choose a texture that suits your skin type. If you have dry skin, go for a cream contour kit, while those with oily skin should opt for a powder contour kit.
Prepping Your Face
Before you begin contouring, it’s essential to prep your face properly. Here are the steps to follow:
- Start by cleansing your face and applying a light moisturizer.
- Apply a primer all over your face to create a smooth base for your makeup to sit on.
- Apply a foundation that matches your skin tone, making sure to blend it well with a makeup brush or sponge.
- If you have any blemishes or dark circles, use a concealer to cover them up.
- Now that your face is prepped, it’s time to start contouring.
How To Contour Different Face Shapes And Features?
Contouring isn’t a one-size-fits-all approach. Different face shapes and features require different techniques. Here are some tips and tricks for contouring different face shapes and features:
- Round faces: Apply contour along the jawline, under the cheekbones, and on the temples to create angles and definition.
- Square faces: Focus on the forehead and jawline to soften the angles and create a more oval shape.
- Heart-shaped faces: Contour the temples and the sides of the forehead to reduce the width of the top of the face.
- Long faces: Apply the contour on the forehead and chin to create the illusion of a shorter face.
- Nose contour: Apply the contour along the sides of the nose to create a slimmer look.
Making Your Contour Last All Day
To ensure that your contour lasts all day, it’s important to fix, blot, and set your makeup. Follow these steps to make your contour last:
- Fix any mistakes with a makeup wipe or cotton bud.
- Blot any excess oil with blotting paper or a tissue.
- Set your makeup with a setting spray or powder to lock it in place.
By following these steps, you will have a perfectly contoured face all day long.
Related: How To Use Revlon Eye Contour Kit?
Best Brushes And Tools For Applying Smashbox Contour Kit

If you’re new to contouring with makeup, getting the right tools is crucial. The right brushes and tools ensure the application is precise and the contours defined. With Smashbox’s contour kit, you can achieve a perfectly sculpted chiseled look effortlessly.
Here are the essential brushes and tools you need to use for the perfect contouring experience with Smashbox products.
Essential Brushes And Tools For Contouring
To achieve a perfect chiseled look, start with these essential tools for contouring:
- Contour brush: Choose a brush with a slanted tip. It helps apply the contour in the hollows of the cheeks and the jawline.
- Blush brush: Used to apply the blush after contouring.
- Fan brush: Helps blend the contour and blush for a natural look.
- Highlighter brush: This brush is used to apply highlighter on the high points of the face like cheekbones and nose.
How To Clean And Maintain Your Brushes?
Brushes help you achieve the perfect contour, but it’s important to clean them regularly to prolong their life. Here are some easy tips to clean and maintain your brushes:
- Use a brush cleaner or mild soap to clean the brushes. Make sure you don’t soak them.
- Rinse the brushes and dry them with a clean towel.
- Reshape the brushes and let them dry naturally.
- Store the brushes in a clean dry place.
Cleaning your brushes regularly can help avoid clogging pores and the buildup of bacteria. It is essential for maintaining healthy skin.
Brushes In Blending And Defining Your Contour
The right tool can make all the difference in blending and defining your contour. For a precise and natural contour, make sure to:
- Apply the contour in the hollows of the cheeks and jawline with the contour brush.
- Blend the contour with a fan brush for a natural look.
- Use a blush brush to apply blush after contouring.
- Apply a highlighter with a highlighter brush on the high points of the face.
- Blend the contour and blush with a fan brush for a seamless look.
Achieving that perfect contour with Smashbox products is all about getting the right tools and using them effectively. Follow these essential tips to ensure you get the best from your contour kit, the right brushes and tools, and the best techniques.
With practice, you’ll be an expert in no time!
Common Errors To Avoid While Contouring
Contouring can be tricky, especially if you are new to it. Here are some common errors to avoid while contouring with Smashbox products:
- Applying too much product: It’s essential to start with a light hand while applying contour powder. Build up the product gradually while assessing the color. If you apply too much initially, it becomes difficult to blend the product properly.
- Ignoring your face shape: Different face shapes require different contouring methods. Study your face shape to identify the areas you want to accentuate or reduce.
- Using the wrong brush: Using the right brush for blending and contouring is vital. The Smashbox angled contour brush is the perfect tool for contouring. The brush is dense, enabling you to apply and blend the product flawlessly.
- Neglecting proper blending technique: Proper blending of the contour shade is crucial to make your contour look natural and subtle. Use a soft brush back and forth or in circular motions to blend out the lines.
Related: Is Native Shampoo Good For Your Hair?
Frequently Asked Questions
What Is Smashbox Contour Kit?
Smashbox contour kit is a makeup product that helps to contour and enhance facial features.
How Do I Choose The Right Shade?
Choose a shade that is two shades darker than your skin tone for contouring and one shade lighter for highlighting.
What Are The Steps To Use Smashbox Contour Kit?
Apply the darker shade in areas you want to contour, blend it properly, and apply the lighter shade in areas you want to highlight.
Can Smashbox Contour Kit Be Used For All Skin Types?
Yes, smashbox contour kit is suitable for all skin types.
How Long Does The Smashbox Contour Kit Last?
Depending on usage, one smashbox contour kit can last anywhere from 6-8 months.
Conclusion
Mastering the art of contouring with smashbox contour kit is surely a game-changer. By following these helpful tips and tricks, you can easily create the perfect sculpted look that you have always desired. The key is to understand your facial structure and work with it instead of mindlessly following someone else’s technique.
Selecting the right shade and using the right brushes can make a significant difference in your final look. Always remember to blend well to avoid harsh lines and achieve a natural finish. Finally, embracing your unique features is what makes your makeup look authentic and compliments your beauty.
Don’t be afraid to experiment and find out what works best for you. With some practice and patience, you will soon be able to contour like a pro with your smashbox contour kit. So, what are you waiting for? Start sculpting your way to perfection!

